
Building a motorcycle fork brace for your Custom bike project.
Regardless of the legality and practicality of this modification, removing the front fender of your bike is just something people do. Feel free to comment below and tell me how stupid it is. People want it, I’ll do it. That’s the bottom line.
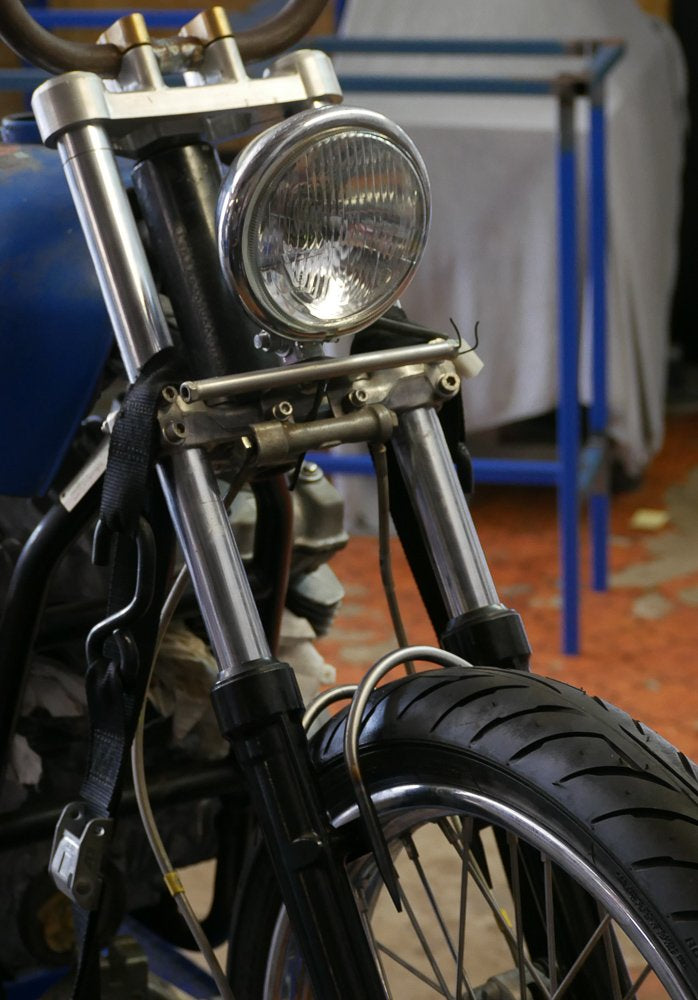
Everyone knows it will throw things up at you from the front wheel, and riding on wet or dusty roads can be an absolute bloody nightmare. But what some don’t realise is the play that removing your front fender can cause in your front end. Especially on older model bikes, removing the front fender can cause a lot of movement in the response of the front wheel when you turn it. To eliminate this, I build fork braces.
Now this is only applicable to conventional telescopic forks, not USD front ends. You can build em on USD forks, but they won’t serve the same purpose. They’ll be more for looks than anything. Now the fork brace will help eliminate the play, but it won’t rectify buggered forks. If your front suspension needs work because the bushings are worn out this is not a band aid fix. Go get your forks looked at and rebuilt or do it yourself!

After making a handful of them over the last few years, I’ve got my process down to an art. Fabricating something that steadies your lower fork legs, and can add a lot of Aesthetic appeal to your front end. One of those little pieces that someone looking close enough will see and think… “huh, that’s actually pretty rad.”
Materials you will need for the fork brace:
- 5-6mm thick flat steel or stainless
- 8-12mm dia. Round bar steel or stainless
- M6 or M8 x 25mm bolts (depending on your forks)
- 6mm dia round bar or 3mm plate steel
- 110-140mm dia offcut pipe (for a bending die)
Tools you’ll need to fabricate a fork brace:
- Tig or Mig welder (I use a 185A BOC TIG)
- Oxy torch (you can get away with a hand held blow torch in a pinch)
- Grinder (cut and sanding disc)
- Drill press or hand drill
- Measuring/marking tools
- Welding table (optional)
This is by no means a race proven option, but for me it’s done the job many times. When choosing your material, higher grade harder steel will provide a stiffer brace, and stainless steel will be the same. Make your own mind up here.
1. Removing the front fender and measure up.
Start by stripping the front fender off, and measuring the fork bolt holes. Normally 65-90 mm apart, youll need about 25mm on either side of the fork bolt to weld the fork brace hoop to. Also take a measurement on the width between your forks, this will determine what size bending die (large pipe or tube) you’ll need to bend the hoops later.
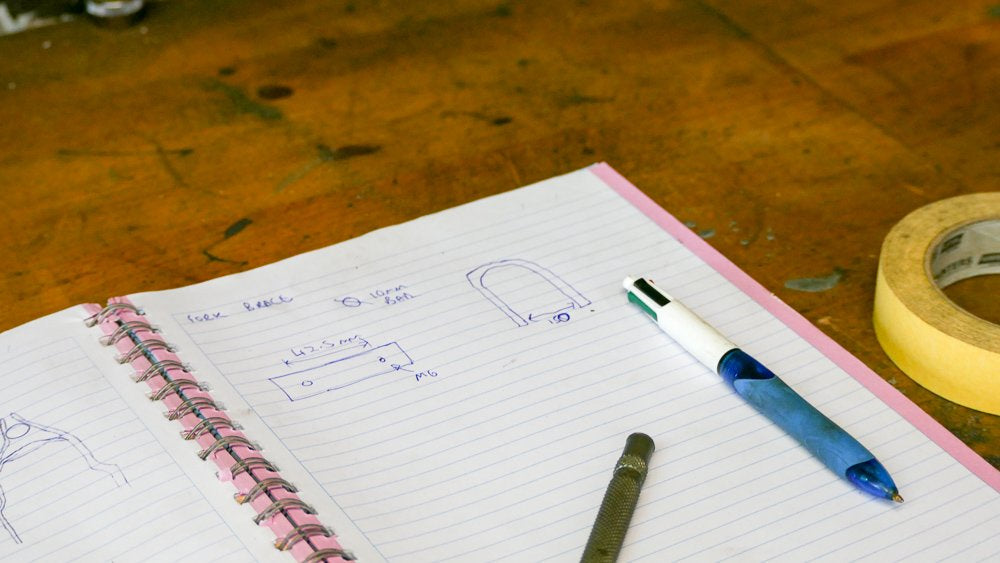
2. Measure, cut and drill your base plates
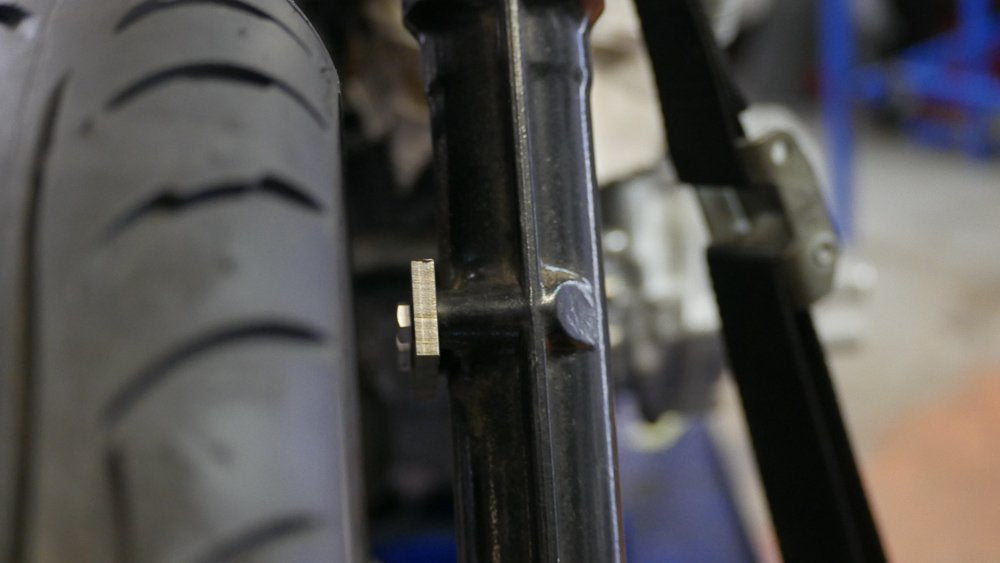
Once your measurements are done, go ahead and cut your fork plates. Using the 6mm steel plate cut 2 pieces to length, mark and drill them to suit your fork bolt holes. Once complete, remove the mill scale and clean ready for welding. Now bolt the plates up, one on either fork, ready to measure the hoops.
3. Fabricating the Fork Brace hoops
To measure these hoops I’ll hand bend a length of tig filler wire (you can use whatever wire you have) stretching over the tyre, and down to either side touching the fork base plates.
for this I’ll normally leave about 30mm of length either side for play room. With your wire template measure the length and cut your large round bar. 2 x hoops will be needed so make sure you’ve got enough round bar for both.
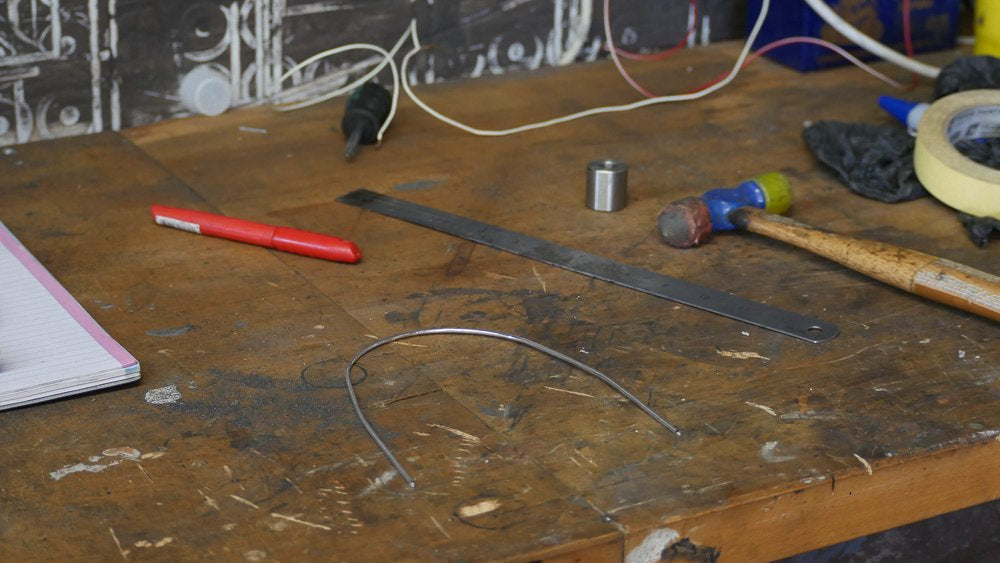
4. Bending your fork brace hoops.
On this particular bike the fork plates are 130mm apart. That means the diameter of my hoop bend needs to match that. This is where your large diameter pipe offcut will come in handy.
Using a pipe with a diameter of 130mm (use whatever your fork width is) I’ll fix that to my welding table to use as a bending die.
The bending part can be done 2 ways.
- Fixing one side of the round bar, heating the bar and bending one side around. This ,method I’ve used before, but its difficult without a proper Oxy set up. As the round bar bends around the die, it can become uneven if the heat isn’t properly distributed. For me the bends ended up being a little out of whack. I was able to fix them, but its always better to get it in one go.
- Marking the center of the bar, heating both sides and bending from the middle tends to work better for me. Here I’ll make a mark in the middle of the round bar, evenly heat both sides of the mark, and bend the hoop from the center. The bend is easier to get uniform, and symmetrical which is important.
Once the 2 hoops are bent, let them cool and give them a final clean before we tackle the fit up.
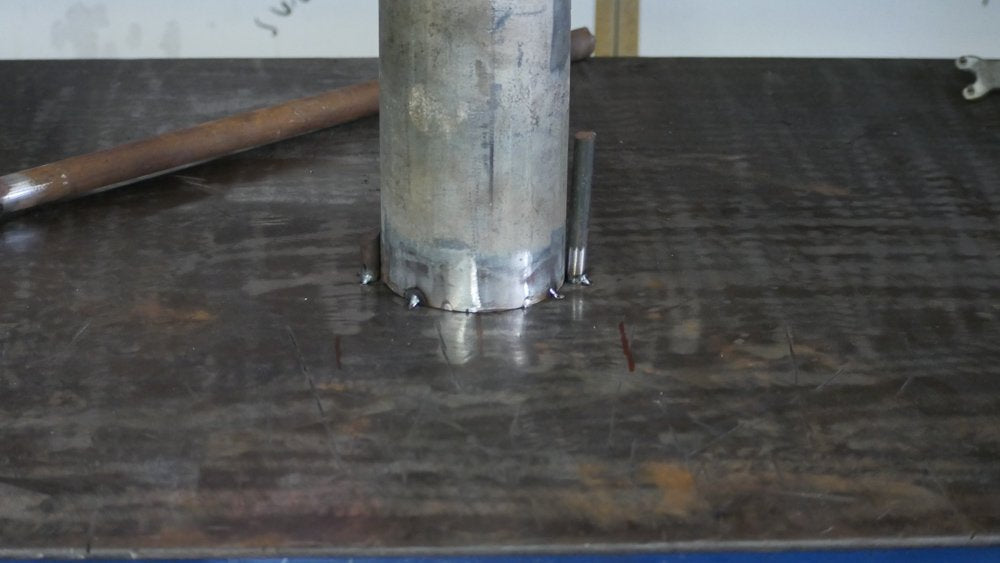
5. Tack welding the hoops
Ready for fit up, I’ll start with the front hoop. For even spacing off the wheel I’ll use a bit of fuel hose, or any evenly sized spacer around 5-10mm off the tyre. Its also important you position the hoops in such a way that you can easily unbolt and remove the fork brace (preferably without removing the front wheel).
Final note on the alignment is to make sure the hoop passes over the length of the plate. This will allow you to get a get weld from top to bottom over the 20-25mm width of the fork plate, thus making the brace a lot stronger than just welding it to the top.
With everything in place and the hoop with proper clearance from the wheel, I progressively tack the hoop in place. Taking care not to get the hoop, plate or forks too hot. Take your time.
Repeating the process for the back. Ensuring enough spacing from the tyre etc. With both hoops in place, make sure before you remove the brace, that enough tack welds are in place that when you finish weld it off the bike, it wont warp out of shape and not fit back on.
A few extra seconds here for additional tack welds may just save you from throwing the whole thing in the bin!
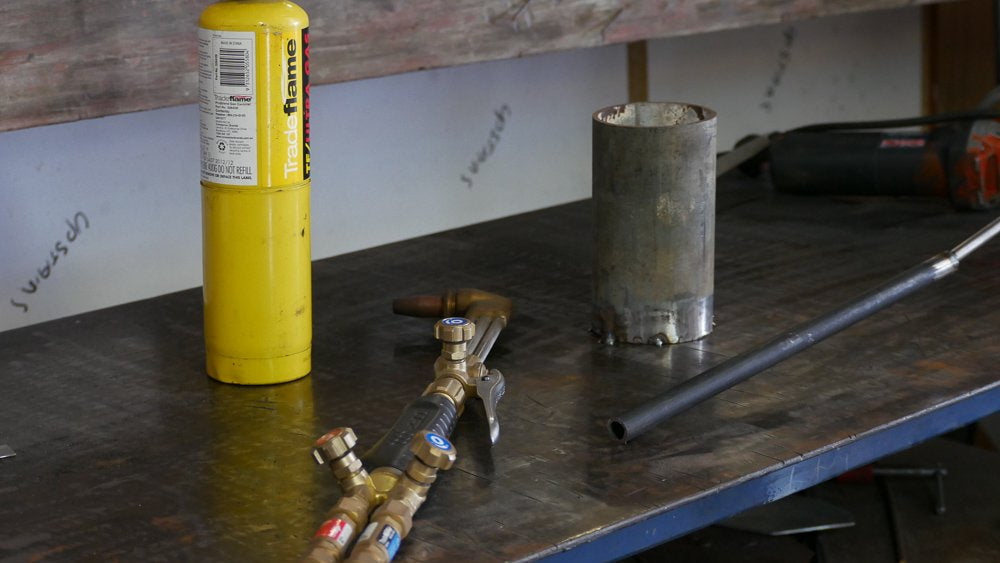
6. Finish welding
Remove the fork brace once its cooled after tack welding, clamp it to the bench and have at it with your welder. After welding, any excess can be trimmed off the fork brace hoops and finished back to look all nice and pretty. This particular brace I had taken a few extra steps to accurately measure, and turn the ends down to a point. No excess needed to be trimmed off here, but on yours there likely will be.
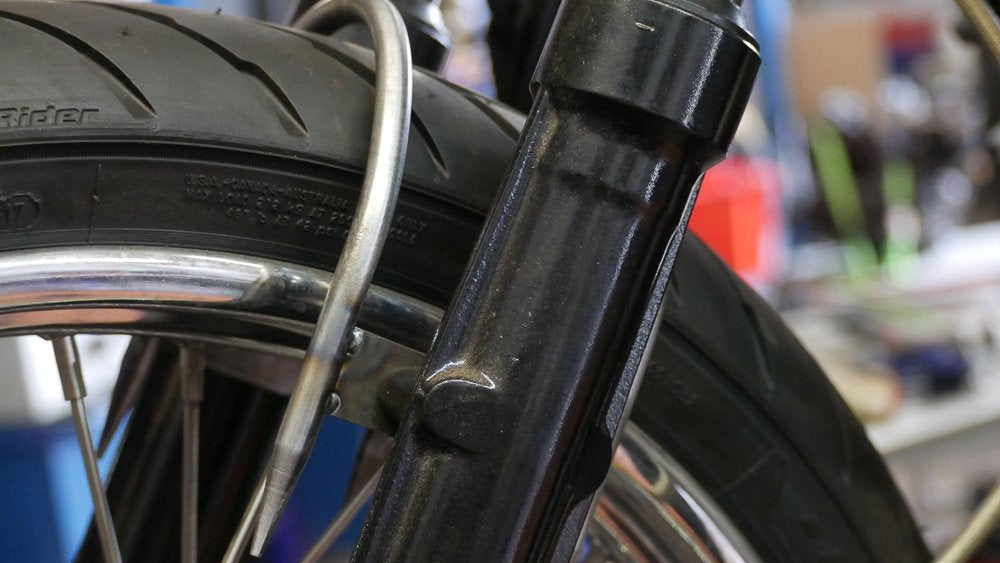
7. Cross bracing the bracey brace, brace.
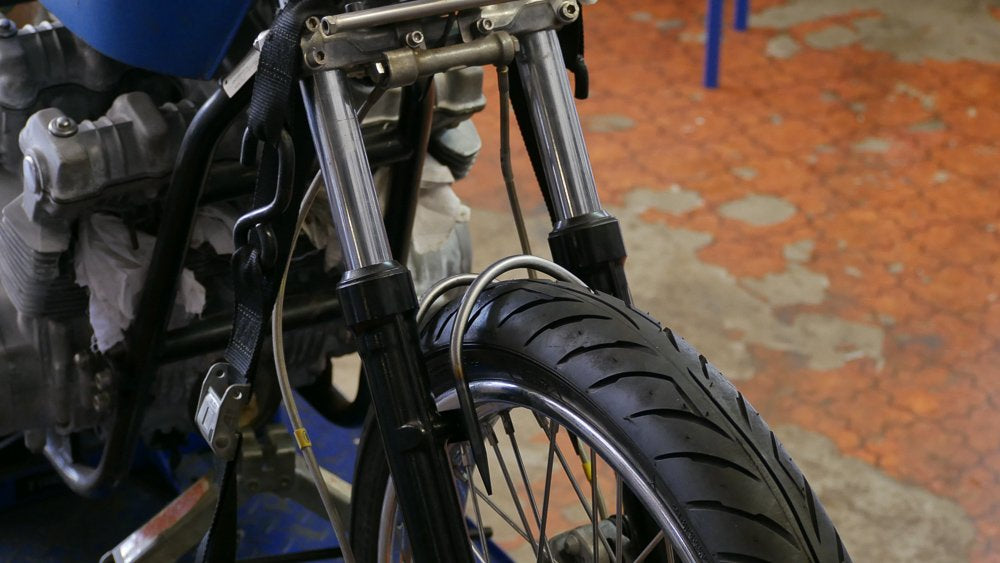
Once welded and finished, throw the fork brace on to check fit up. Once in place we need to add bracing. As it stands there will be a noticeable improvement in the movement between front wheel and handlebars. The cross bracing will just bring it home. You can use whatever brace pattern you like, a cross, 2 opposing hoops, round bar or flat plate. The idea behind the cross brace is to reduce the leverage distance between each fixed point.
Right now, the fork brace has tied each fork leg to the other. Placing a single cross brace in the middle will halve that distance, but the bracing is at the centre point. For best results I will tie the brace together in 2 points. One on either side of the bend. Reducing the leverage distance to 1/3. Similar to the fork brace on the TS185.
It’s a little hard to explain over a keyboard, without a million diagrams. But steer your handlebars with the wheel fixed and watch where it flexes, it will soon make sense what I’m rambling about.
The CB900 chopper brace was quite strong already, so I went with a simple plate steel cross brace in the centre.
8. Cover your bases.
If you’re ballsy enough to want to ride without any front fender, go for it, but I’d suggest at least putting provision for a fender mount at a later date. Before you paint or polish it up, weld a few threaded slugs or something on the brace so if you need to mount a fender you can.
With all that covered off, and your epic new fork brace bolted in place, you should have a pretty nice bit of fabrication on your front end. Something that will serve a purpose, and if done right add a bit of your own style to the bike. Thanks for taking a minute, and I hoped that has shed some light on our process.
Leave me a comment below with your thoughts or anything I might have missed!
WE BUILD BIKES WITH PURPOSE.
Purpose Built Moto is home for unique custom motorcycle builds. We offer a unique motorcycle customizing experience in the heart of the Gold Coast.


4 comments
Good advise.
Wow :)
This is an incredible collection of ideas!
Waiting for more helpful pieces.
You would amazing to read a similar one here-
diysbest.com
Thanks Eric, This one was only recently posted, glad you found it some help. I used the same method on my TS build.
Tom
This is fantastic information for me and my ts185. I just rebuilt my forks and I bought a solid fork brace that would look good but it doesn’t fit over my tire properly I have been considering fabricating my own brace but It would be my first. Lol I try to do my best at building quality stuff that is esthetically pleasing and Your directions make me feel much more comfortable about going this route. I will always try to do stuff as different as I can because I like being original. especially when it comes to my bike builds! I’ll definitely add a bar or something so I don’t feel like I’ve copied your design exactly. With that being said, I couldn’t have found any better directions to go off of! I’m so stoked that I’ve found someone that understands all my concerns about my build you guys have already been through it with yours. I feel that you know what’s up and will be able to help me I look forward to talking with you and doing some business with you. I’m also looking to clean up my handlebars and want to purchase some light/switches and gauges as well! You guys have my attention For sure!